Learn maths and programming with a photo booth
The /camera TRANSFORM tab is a photo booth in which every effect is twenty lines of JavaScript you can edit, running on your own face, thirty times a second. That combination is unusually good for teaching: the maths is small enough to fit on a slide, and the feedback is so immediate that a wrong sign is not a mark on a worksheet, it is your nose in the wrong place. This page is the lesson plan — six effects, the arithmetic behind each one, and exercises where you predict the result before you press Apply.
The whole thing rests on one idea
A picture is an array of numbers. Every frame from the camera arrives as one flat list of bytes, four per pixel — red, green, blue, and alpha (opacity) — laid out left to right, top row first:
function transform(pixels, width, height, t) {
  // pixels  Uint8ClampedArray, 4 bytes per pixel, values 0–255
  // t       seconds since you pressed Apply

  return pixels;   // ← the identity effect: change nothing, see the camera
}
The one formula worth putting on the board is the address of a pixel, because every effect on the row is built out of it:
i = (y * width + x) * 4     // the red byte of the pixel at column x, row y

pixels[i]      // red      pixels[i + 2]  // blue
pixels[i + 1]  // green    pixels[i + 3]  // alpha
That is a two-dimensional grid stored in one dimension, which is a genuine piece of mathematics and one that normally arrives dry. Here it arrives as a question you can answer by looking: multiply by 4 and you step a pixel; multiply by width * 4 and you step a row. Get the multiplication wrong and the picture shears diagonally across the screen — which is not a bug so much as a diagram of what you did.
Lesson 1 — arithmetic on a single number
The first effect that is not the identity is Invert, and it is one line of arithmetic applied to every byte:
pixels[i] = 255 - pixels[i]; // …and the same for i + 1 and i + 2Subtraction as a reflection: 0 becomes 255, 255 becomes 0, 128 stays put. Ask what happens at the fixed point and you have asked a real question about a function, and the answer is on the screen — the mid-greys barely move while the extremes swap.
The second thing to try is the one everybody tries anyway, and it hides a lesson worth having:
pixels[i] = pixels[i] + 60; // brighter… up to a point- What happens to a pixel already at 220 when you add 60?
- Try it. The bright parts of the room go flat white and stay there. Why can they not go past 255?
- Now try
pixels[i] * 1.3instead. Which one keeps more detail in the bright areas, and why?
The answer is in the type. The array is a Uint8ClampedArray: eight bits per value, so the range is 0–255, and anything outside it is clamped to the nearest end rather than wrapping around. That is saturation arithmetic, and it is why over-exposed photographs lose detail permanently.
Lesson 2 — a weighted average that is not the obvious one
Black & white looks like it should be the mean of the three channels. It is not:
const y = 0.299 * pixels[i] + 0.587 * pixels[i + 1] + 0.114 * pixels[i + 2];
pixels[i] = pixels[i + 1] = pixels[i + 2] = y;
Three weights that sum to 1 — the definition of a weighted average — and green carries nearly six times the weight of blue. The reason is not arbitrary: the human eye has far more receptors for green light than for blue, so a green pixel looks brighter than a blue one of the same numeric value. The weights are the Rec. 601 luma coefficients, and they encode a fact about eyes inside a formula about numbers.
- Change the three weights to
1/3each and point the camera at something blue, then something green. Which one changes more? - Set the weights to
1, 0, 0. You are now looking at the red channel alone. What happened to anything red in the room, and why is skin so bright? - Do the weights have to sum to 1? Try
0.6, 1.2, 0.2and explain the result using the clamping you found in Lesson 1.
Lesson 3 — integer division, and a face you cannot recognise
Pixelate is the effect everyone reaches for, and underneath it is the most useful piece of arithmetic on the page: divide the plane into blocks, average each block, paint the average back.
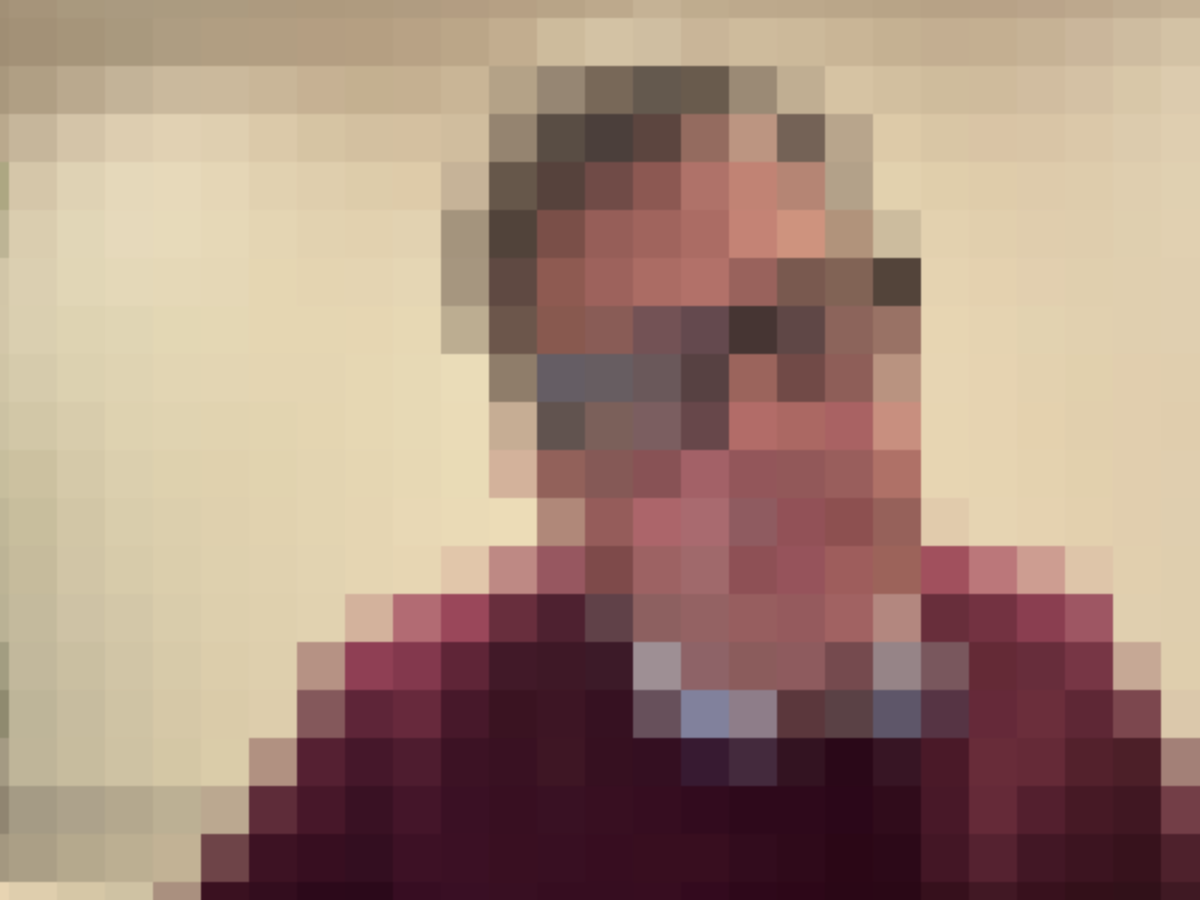
MODIFIER = 24. Every 24×24 square has been replaced by one colour — the mean of the 576 pixels that used to be there. Note what survives: the position of the head, the colour of the shirt, the direction of the light. And what does not: any of the detail that makes a face a particular face. That trade is the whole subject of image compression, and it is visible in one press.const MODIFIER = 24; // block size, in pixels
const MODIFIER_RANGE = [1, 64]; // and how far the dial may push it
for (let by = 0; by < height; by += MODIFIER) {
for (let bx = 0; bx < width; bx += MODIFIER) {
// Pass one: add up every pixel in the block…
let r = 0, g = 0, b = 0;
for (let y = by; y < by + bh; y++) {
let i = (y * width + bx) * 4;
for (let x = 0; x < bw; x++, i += 4) { r += pixels[i]; g += pixels[i+1]; b += pixels[i+2]; }
}
const n = bw * bh;
r /= n; g /= n; b /= n; // …divide by how many there were: the mean
// Pass two: paint that one colour back over the whole block.
}
}Two nested loops over blocks, two more over the pixels inside a block: four levels of nesting that no one has to be talked into, because the shape of the loops is the shape of the picture. And the arithmetic is exactly the mean a maths class already knows — sum, then divide by the count.
The knob is on the picture
Most of these effects turn on exactly one number, and an effect that names it MODIFIER — with a MODIFIER_RANGE beside it saying how far it may be pushed — gets a slider on the picture itself. Drag it and the block size changes while you watch, at whatever size the picture is, on a phone as well as a laptop.
The slider holds no value of its own. Every move rewrites that line in the editor and recompiles, so after dragging the dial down to 8 the code on screen says const MODIFIER = 8; — the number you felt is the number you can now read, copy and argue about. That matters for teaching: the exercises below can be done with a thumb in three seconds each, and the class still ends up looking at the constant that did it. (Declare the pair in an effect you write yourself and you get a dial too; delete it and the dial goes away.)
- The frame is 640×360 and
MODIFIERis 24. How many blocks are there across? Down? (Careful: 640 ÷ 24 is not a whole number. What does the code do with the leftover strip?) - Drag the dial down to 8. At what block size does a face become recognisable again? Everybody in the room will disagree by a few pixels — that disagreement is the lesson.
- Drag it all the way to 1. Predict the result before you let go.
- Why must the code read every pixel in a block before it writes any of them? What would the picture look like if you painted as you went?
Lesson 4 — quantisation, or how many colours do you actually need
Posterize is three lines and one idea: instead of 256 possible values per channel, allow only MODIFIER of them, evenly spaced, and round each pixel to the nearest one.
const MODIFIER = 4;                       // levels per channel — the dial
const MODIFIER_RANGE = [2, 16];
const step = 255 / (MODIFIER - 1);        // 4 levels → 0, 85, 170, 255

pixels[i]     = Math.round(pixels[i] / step) * step;
pixels[i + 1] = Math.round(pixels[i + 1] / step) * step;
pixels[i + 2] = Math.round(pixels[i + 2] / step) * step;
Math.round(v / step) * step is the standard way to snap a number to a grid, and it appears everywhere once you have seen it — rounding money to the nearest cent, a slider to the nearest notch, a sensor reading to the nearest degree. Here the grid is a set of colours, so you can see it.
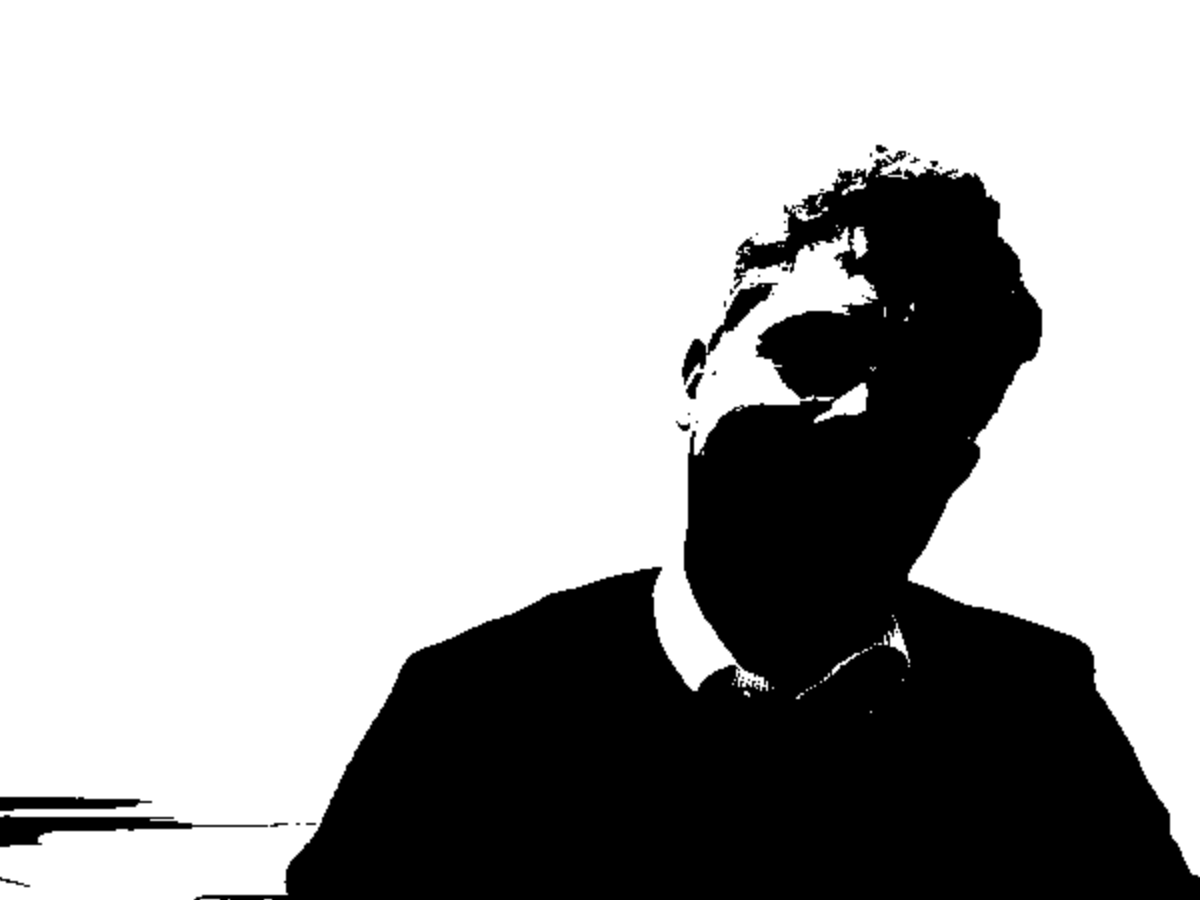
MODIFIER = 2. Each channel can now be only 0 or 255, so a bright room collapses to white and everything darker than halfway collapses to black — which is where posterizing meets the Threshold effect further along the row. Twenty-four bits per pixel have become three, and the shape of a person survives all of it.- Drag the dial to 2. How many different colours can the whole picture now contain? (Each channel has 2 choices, and there are 3 channels.)
- How many at
MODIFIER = 4? At 8? Write the general formula, then check each answer with the slider. - Why is
stepdivided byMODIFIER - 1rather than byMODIFIER? What would go wrong at the top of the range if it were not? - Which effect loses more information — Posterize at 4 levels, or Pixelate at a block size of 24? Defend your answer by counting the numbers each one throws away.
Lesson 5 — coordinates, and the day trigonometry earns its keep
Everything so far changed the colour of a pixel and left it where it was. The second half of the effect row moves pixels around instead, and that means coordinates. Twirl is the one to teach with, because it is a rotation whose angle depends on the radius:
const MODIFIER = 2.4;                    // radians of rotation at the centre
const MODIFIER_RANGE = [-6.5, 6.5];      // the dial, and it crosses zero
const src = pixels.slice();              // a copy to read from — see below
const cx = width / 2, cy = height / 2;
const R = Math.min(cx, cy);

for (let y = 0; y < height; y++) {
  for (let x = 0; x < width; x++) {
    const dx = x - cx, dy = y - cy;
    const r = Math.sqrt(dx * dx + dy * dy);       // Pythagoras: distance to centre
    if (r >= R) continue;                        // outside the disc: leave it alone
    const a = Math.atan2(dy, dx) - MODIFIER * (1 - r / R); // angle, twisted
    const sx = Math.round(cx + r * Math.cos(a));          // back to x, y
    const sy = Math.round(cy + r * Math.sin(a));
    // copy the pixel at (sx, sy) to (x, y)
  }
}
That is a full conversion to polar coordinates and back, in a form a fifteen-year-old can follow: r from Pythagoras, the angle from atan2, and cos/sin to return. The twist is MODIFIER * (1 - r / R) — a linear interpolation that is 1 at the centre and 0 at the rim, which is exactly why the middle spins and the edge does not.
- Push the dial to 6.3, near
Math.PI * 2— a full turn at the centre. Why does the middle look almost normal again? - Replace
(1 - r / R)with(1 - r / R) * (1 - r / R). Where does the shearing concentrate now? - Drag the dial through zero into the negatives. What has changed, and why is zero the one setting that does nothing at all?
- Change
atoMath.atan2(dy, dx) + t * 0.5. Now it spins on its own, forever. What ist?
Lesson 6 — the fourth argument is time
t is the number of seconds since you pressed Apply, as a floating-point number, and it turns every effect above into an animation. Wave is the smallest demonstration:
const shift = Math.round(Math.sin(y * 0.06 + t * 3) * 12); // rows slide on a sineThree constants, three separate ideas, and each one can be changed on its own: 0.06 is the spatial frequency (how many ripples fit down the frame), 3 is the temporal frequency (how fast they travel), and 12 is the amplitude (how far the rows move). A sine wave taught this way stops being a shape in a textbook and becomes three knobs with a face behind them. The amplitude is the one on the dial — it is MODIFIER in the effect as shipped — so the whole of “what does the amplitude of a sine wave mean” is one drag, on your own face, while the wave keeps travelling.
What it teaches about programming, not just maths
Four lessons come free, and they are the ones that are hard to stage on purpose:
- Read-before-write. The remaps start with
const src = pixels.slice(), and the interesting exercise is to delete that line. The effect does not crash — it produces a smeared, self-consuming mess, because pixels you already wrote are being read as though they were still the original. Aliasing, demonstrated in one press. Pixelate needs no copy for a reason worth working out: each block reads only its own pixels, and reads all of them before it writes any. - Cost is real and it is measured. The diagram above the picture reports how long your function took on the last frame. The camera delivers a new frame every 33 ms at 30 fps, so that is the budget — go over it and the frame rate on the right falls, visibly. A per-pixel loop at 640×360 is 230,400 iterations, thirty times a second. Nobody has to be told that nested loops are expensive when the number is on the screen.
- An infinite loop cannot be interrupted. Write
while (true) {}and the tab does not hang: the effect runs in a Web Worker, and after two seconds the page terminates the whole thread and puts Passthrough back — with your code still in the editor. That is a genuine lesson about concurrency, and it comes with a working escape hatch instead of a lost session. - The error is the fastest teacher in the room. Forget the
returnand the picture freezes. Get the stride wrong and the image shears. Swapxandyand it transposes. Each mistake has a distinctive, memorable look, and after twenty minutes a class can diagnose them from across the room.
A 45-minute plan that works
- 0–5 min. Open /camera/transform, press Start camera (on a machine that has allowed the camera before, the picture is already there), and walk the whole effect row with the left and right arrow keys (on a tablet or a phone, swipe across the picture instead). No code yet — just the claim that all twenty-one of these are on the screen in front of them.
- 5–10 min. The address formula,
i = (y * width + x) * 4, on the board. One diagram of a 4×3 grid with the indices written in. - 10–20 min. Invert, then brightness. Discover clamping by hitting it (Lesson 1).
- 20–30 min. Black & white and the weights (Lesson 2). Ask why green wins before telling them.
- 30–40 min. Pixelate, with
MODIFIERas the single knob — literally, on the picture (Lesson 3). Hold a vote on the block size at which a face is no longer a person, and settle it by dragging the dial. - 40–45 min. Everyone records a five-second clip of their own best effect. It stays in the tab; downloading it is their choice.
Timelapse: the same tab as a measuring instrument
Record has a second mode. Timelapse keeps one frame every interval you choose — from a fifth of a second to thirty seconds — and then replays them at 30 fps, so an hour of real time becomes a clip you can watch. The compression factor is arithmetic a class can do out loud: at one frame a second played back at thirty, the film runs 30× faster than the room did; at one frame every ten seconds, 300×.
That turns the photo booth into a laboratory instrument for anything too slow to watch:
- A plant turning towards a window over an afternoon (one frame every 30 s).
- Ice melting, a puddle drying, condensation forming on a cold glass (one frame every 2 s).
- A shadow crossing the floor, which is a direct measurement of the Earth turning (one frame every 30 s).
- A whole class solving something on a whiteboard — with Posterize or Pixelate left switched on, so the film records the work and not the faces.
That last one is not a gimmick. The effect is applied before anything is recorded, so what lands in the file is the transformed picture and never the camera frame behind it. A pixelated timelapse of a classroom is a recording that was never identifiable in the first place.
Try it
Related reading
- What your browser knows about your camera — asked, supported, got, and the four depths at which you can get the bytes off a sensor.
- Inside a JPEG: markers, EXIF and quantization — the quantisation of Lesson 4, done properly, on frequencies instead of on colours.
- Inside an MP4: moov, mdat and fast start — where a recorded clip goes when you open it.
- How we auto-detect a file’s format — the sniff a capture goes through on its way to a toolkit.